E-commerce tracking. When it comes to tracking, Google’s e-commerce tracking tools are now standard. Especially Google Analytics is indispensable in e-commerce if you want to track the relevant data view for your online marketing campaigns. Equally important is Google Search Console as well as Google Tag Manager. What sounds like a lot of effort is quickly integrated into your online store. What’s important is that you understand how these three tools intertwine to extract the best possible value for your e-commerce business and to be able to track your marketing goals. Below we will show you how to integrate the basics of e-commerce tracking tools, as well as Google Analytics on your website.
Why should Google Analytics be included in the website?
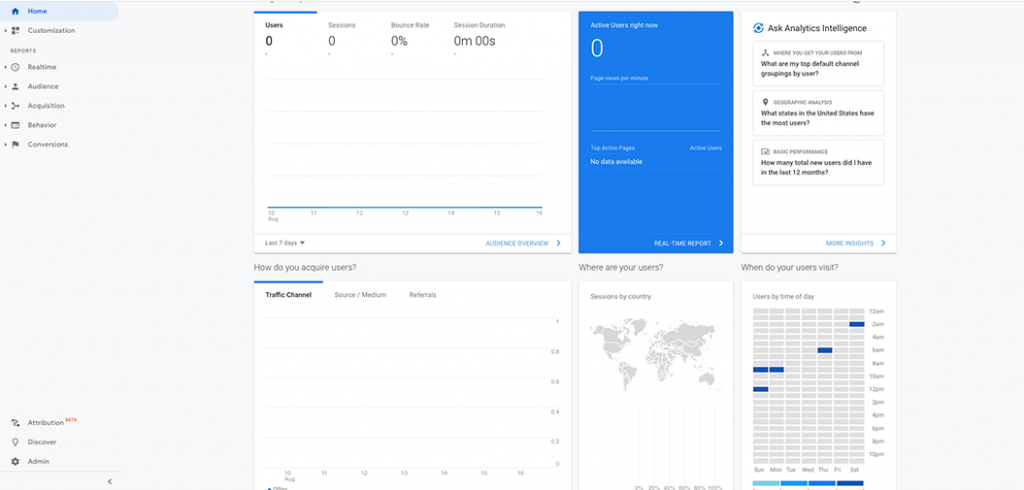
An embedded Google Analytics code is mainly used to give you an overview of the performance of your various campaigns as well as information about your visitors. Thanks to the Google Analytics tracking data, it becomes transparent from which location, at what time, via which campaign, with which operating system/browser, and with which end device their website is accessed. Whether you run the campaigns via Google Ads or social media, by integrating Google Analytics you can evaluate them and analyze in a data view how well your campaigns perform. Likewise, organic traffic is also visible through Google Analytics. This shows whether your content marketing strategy is paying off. If you don’t want to waste your marketing budget thoughtlessly, you should integrate the Google Analytics code and accordingly not do without e-commerce tracking.
Why should you integrate and use Google Search Console?
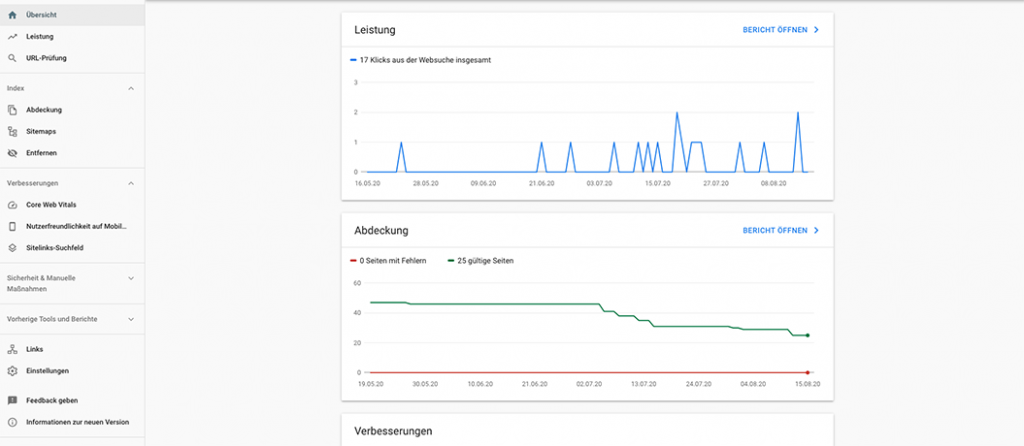
While Google Analytics breaks down common metrics for your online marketing managers, Google Search Console is especially essential for SEO and content marketing managers, as well as for website operators. Because the Google Search Console plays back errors within your website structure. If, for example, a link is broken or some files are slowing down your website, you will find the specific error messages in the Google Search Console. In addition, you can see which web pages are indexed by Google – and which are not. Especially if you have a login area for your customers in your online store, you certainly don’t want this to be indexed. This would be an absolute fiasco in terms of data protection.
If you want to know which keywords get the most hits, Google Search Console is also in demand. Under the heading „Services“ you can see which are the top ten organic keywords for your website. Ideally, your main products will be found here. For example, if you mainly sell lawnmowers, „buy lawnmower“ should appear in the top ten organic keywords for your website. You can also view the number of clicks and impressions, as well as the CTR and position for specific keywords, web pages, or directories here. Additionally, using Google Search Console also provides you with information on page speed, responsiveness and helps in checking link building.
Why integrate and use Google Tag Manager?
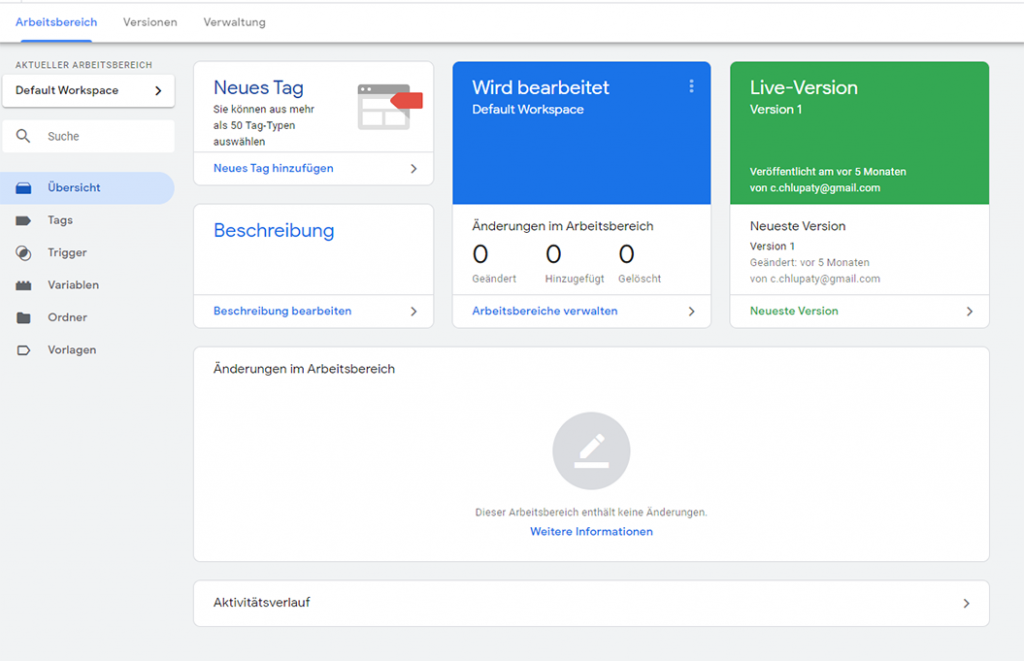
Unlike the first two tools, Google Tag Manager is not used for analysis. Instead, you can use Google Tag Manager to tag and thus track elements on your website or create an interface to other tools without involving IT. For example, you can easily integrate the tracking pixel of Facebook or external publishers on any landing page to have the key figures (page views, bounce rate, conversion, etc.) played out in Google Analytics and thus analyze the success of the respective campaign. The Tag Manager is therefore often the interface for setting up all e-commerce tracking software.
Instruction: Integrate Google Analytics
To integrate Google Analytics into your website, you first need a Google account. Once you have created a Google account, the full range of Google tools is available to you: from your own Gmail account and Google Drive to Google Analytics, the Google Search Console and the Google Tag Manager. Now go to the website https://analytics.google.com/. The following form will appear there:
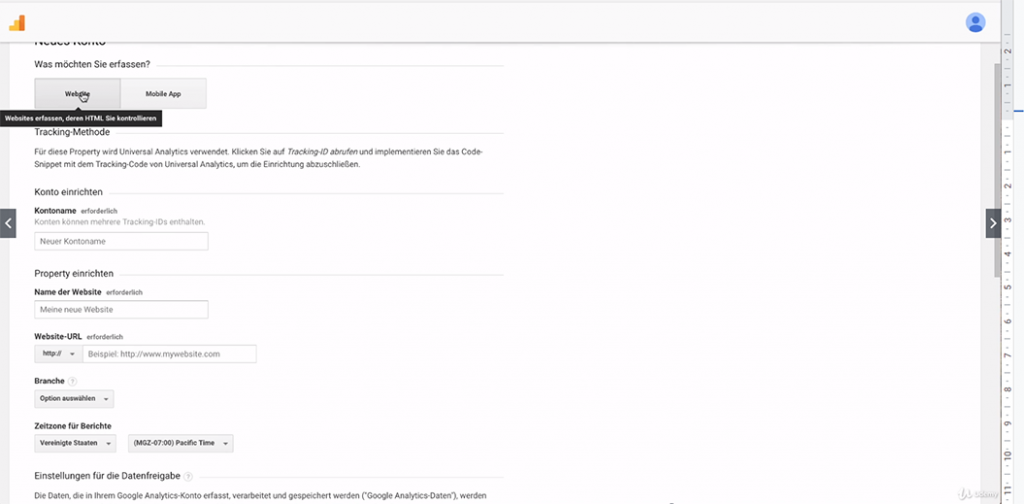
Here you first determine whether you want to track a website or a mobile app. Next, you define a name for your Google Analytics account. The name of your company is a good choice here. Generally speaking, you can track different websites/apps within one Google Analytics account. Google calls individual websites a property. To get started, enter the name and URL of your desired website. When specifying the URL, make sure that you select HTTPS instead of HTTP if your website is secured by an SSL certificate. When setting up e-commerce tracking at an online store, such a certificate should be provided in any case. If you have mistakenly selected HTTP instead of HTTPS here, this is not the end of the world. Once your account is set up, simply select the menu item „Property Settings“ in the „Property“ tab in the admin area. There you now have the option to correct your selection. Towards the end, you’ll find the self-explanatory branch and time zone details, as well as the data sharing settings. Here you can determine yourself which of your data Google is allowed to store and use. Read this part carefully. Decide for yourself where you want to place a checkmark.
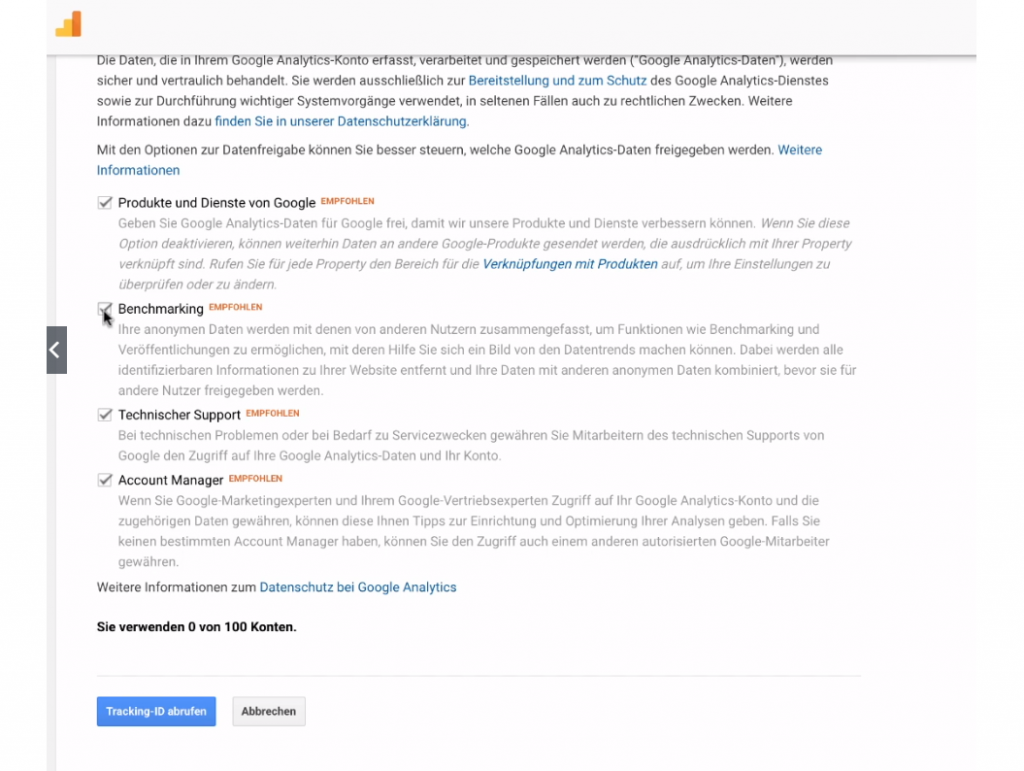
Once you are done, click the „Get Tracking ID“ button. Now a pop-up window will open asking you to read the Google Analytics Terms of Use for your country. These terms of use also include Google Search Console and Google Tag Manager. In general, German data protection law requires you to inform the user of your privacy policy if your website is tracked with Google Analytics and Co. It is best to update your privacy policy already before you connect your website with Google Analytics. To ensure that your online store complies with data protection regulations, we strongly recommend consulting an expert! The General Data Protection Regulation (DSGVO) regulates the handling of personal data within the EU and accordingly only applies to personal data. Accordingly, every online store must adhere to certain rules for both anonymized and personal data and give users control over their data. In the use of tracking measures, there is no way around a so-called cookie banner.
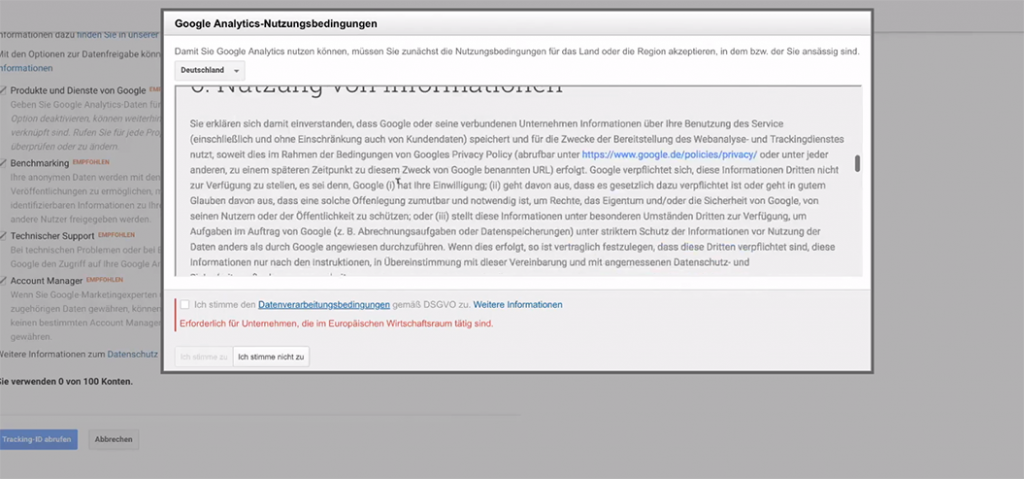
Carefully read the terms of use of Google Analytics for Germany.
After you have confirmed the terms of use, the dashboard of your Google Analytics account opens, the „headquarters“ of e-commerce tracking, where you will be shown your tracking ID. The tracking ID is composed of the letters UA and a ten-digit string of numbers: UA-XXXXXXX-X. Under the general ID, you will find a JavaScript code snippet, the so-called gtag.js- Google Analytics tracking code. For data to be transferred from your website to Google Analytics, you must include it on your website. By doing so, you not only verify your website for Google Analytics, but also for Google Tag Manager and Google Search Console at the same time. To include the gtag.js Google Analytics code on the website, there are two ways:
Option 01: Integration of Google Analytics via the tracking code
You copy the gtag.js tracking code and post it directly after the -tag of your website. The prerequisite is that you have access to the HTML code of your website. However, there is a certain risk if you mess around with the HTML of your website as a layman. If you use WordPress, you can remedy this with the „Insert Headers and Footers“ plugin. This plugin will embed tracking tags and pixels on your website for you. This is a way to integrate Google Analytics.
Option 02: Integration of Google Analytics via Google Tag Manager
You use Google Tag Manager to create a universal Google Analytics tag. This variant is a bit more complicated, but the best variant for extensive e-commerce tracking. Because this ensures the link between Google Analytics and Tag Manager. You want to track the interaction of users with a certain page element via Google Analytics? Then create a tag in the Tag Manager instead of hiring a programmer. You can access the Google Tag Manager at the following URL: https://tagmanager.google.com/.
Here you will now also be prompted to install Google Tag Manager and verify ownership via the specified website by including the following code:
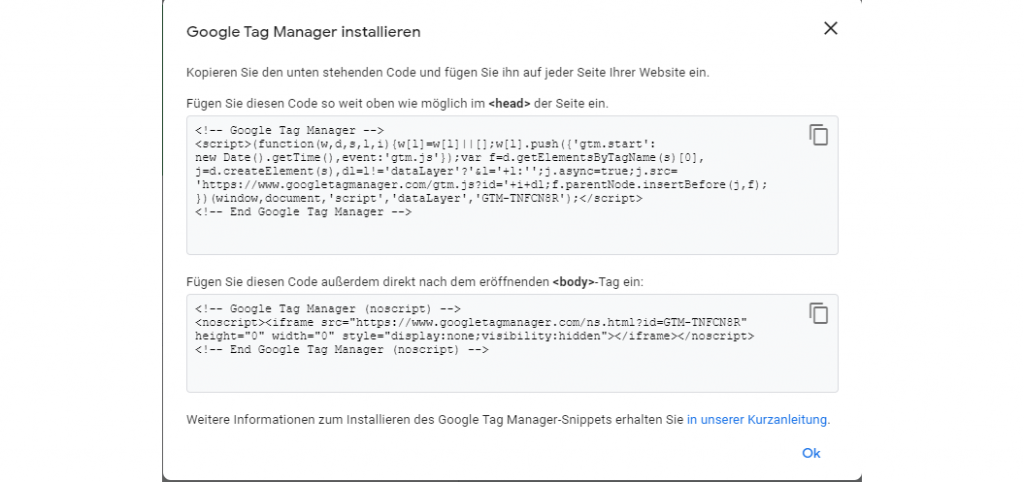
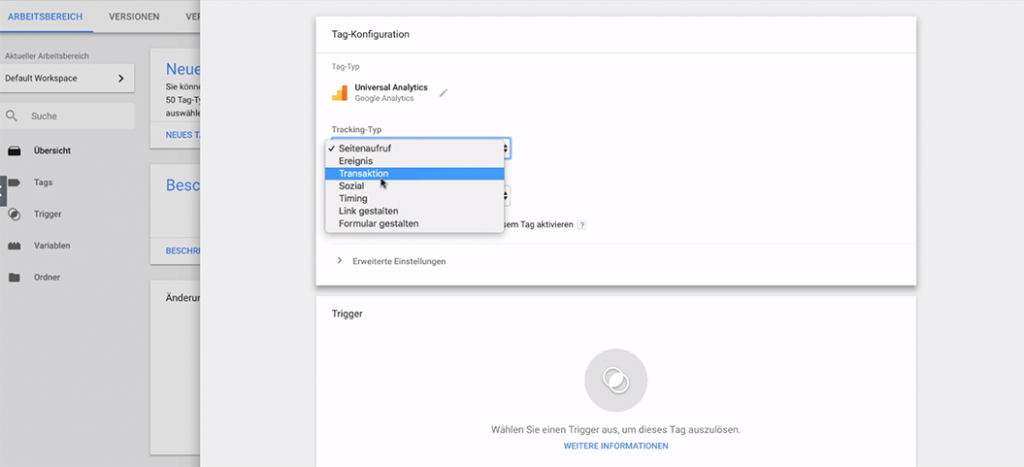
After that, you determine what should be tracked: There are seven different options here. For starters, it is recommended to track page views.
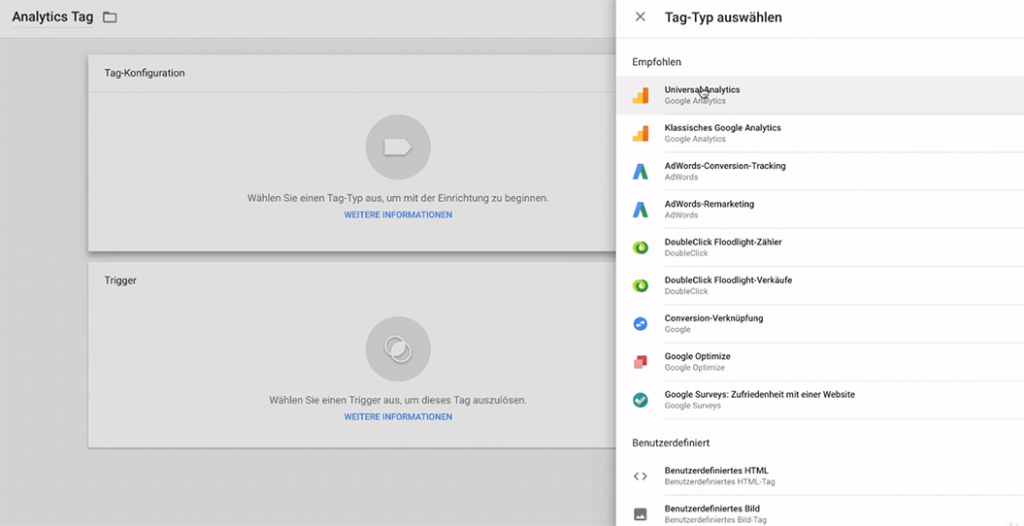
For starters, select page view tracking.
Now only one variable is missing. Since there is none yet, simply create a new variable. So that you can assign the variable to the previously created tag, the name should be analogous – for example, „Name of your website Google Analytics“.
Then enter the tracking ID (UA-XXXXXXXXX-X) from your Google Analytics account. Before you finish the process with the Save button, open the menu „Additional settings“ > „Fields to be set“. Here, set the field name to „anonymizeip“ and the value to „true“. This ensures that the IP address of the tracked user is anonymized. If you do not make this setting, your Google Analytics e-commerce tracking is not privacy-compliant and you risk legal consequences.
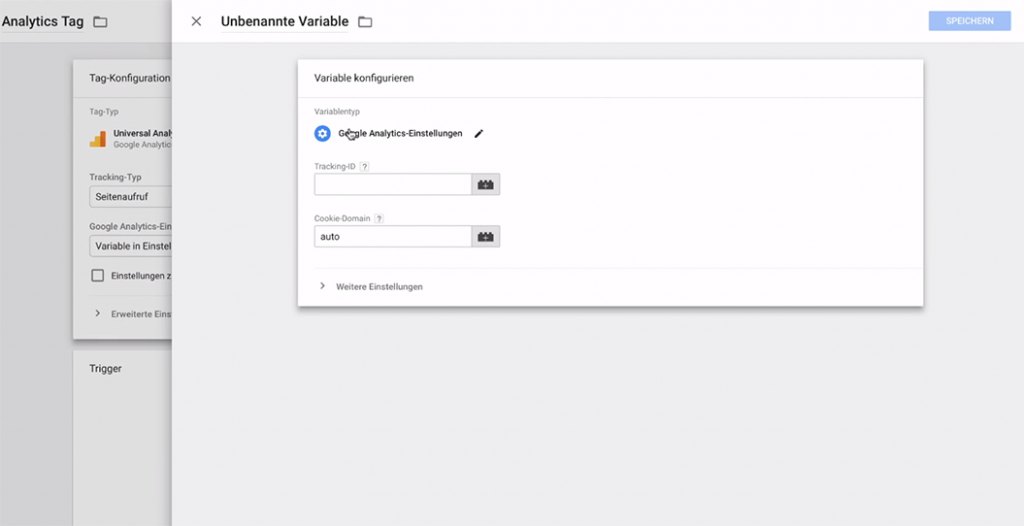
Then enter the tracking ID (UA-XXXXXXXXX-X) from your Google Analytics account. Before you now complete the process with the Save button, open the menu “More Settings” > “Fields to Set”. Here, use “anonymizeip” for the field name and “true” for the value. It is thus ensured that the IP address of the tracked user is anonymised. If you do not apply this setting, your Google Analytics tracking is not data protection-compliant and you risk legal consequences.

Next, save your variable to get back to the configuration of your tag as well as the trigger. You are almost at the end: you have already defined the tag and variable. Finally, you only need to set a trigger. In your case, the trigger for your tag is „All Pages“. After all, you want to track page views on all subpages of your website.

With the „All Pages“ trigger, every page view on your website is tracked.
Press Save and congratulate yourself: you have successfully created your first custom tag and are one step closer to adding Google Analytics to your website
How to link Google Search Console with Google Analytics to include Google Analytics
You have already set up and linked Google Analytics and Google Tag Manager. This also gives you automatic access to the Google Search Console. You do not need to set this up additionally. Your website should already be stored there as a property when you call up the following URL: https://search.google.com/
However, your Google Analytics account and Search Console are not yet linked. To ensure this, go to the admin area of Google Analytics. There, under the „Property“ tab, select the „Property Settings“ menu item. Here you will find the button „Adjust Search Console“ under the item Search Console.
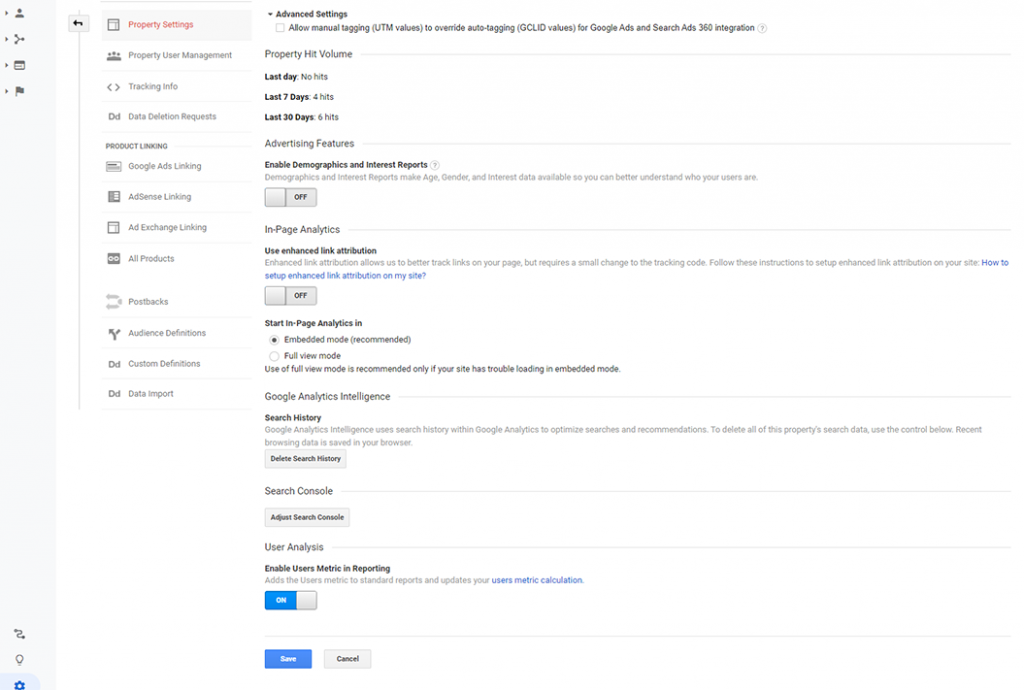
The following window will open, click „Add“ here.

The „Enable Search Console data in Google Analytics“ window will open, displaying the properties you have created so far (websites linked to Google Analytics). Now select the property for which you want to link Google Analytics with Google Search Console and press the Save button.
Done! E-commerce tracking by embedding Google Analytics
It is important to know that there are several ways to include Google Analytics, Google Tag Manager, and Google Search Console on your website. Some prefer to link the Google Search Console to the website first, while others attach importance to setting up Google Analytics first. Often there is a certain inhibition to deal with the Google Tag Manager at the beginning. However, online marketing experts agree that the best option is to integrate Google Analytics via the Google Tag Manager. This is because the direct link between Google Analytics and Google Tag Manager pays off rapidly: you track and analyze every desired element on your website to constantly improve without having to rely on a lot of technical know-how. In combination with the Google Search Console, which gives you concrete SEO measures at hand, you are well supplied in the area of tracking tools. Now you only have to deal with how you want to evaluate Google Analytics & Co and formulate sustainable measures to pull ahead of the competition.
If you are interested in further exciting professional articles on the topic of e-commerce, subscribe to the IAW newsletter. This way you will regularly receive high-quality content as well as relevant updates about the International Trade Fair for Promotional Products and Imports.


